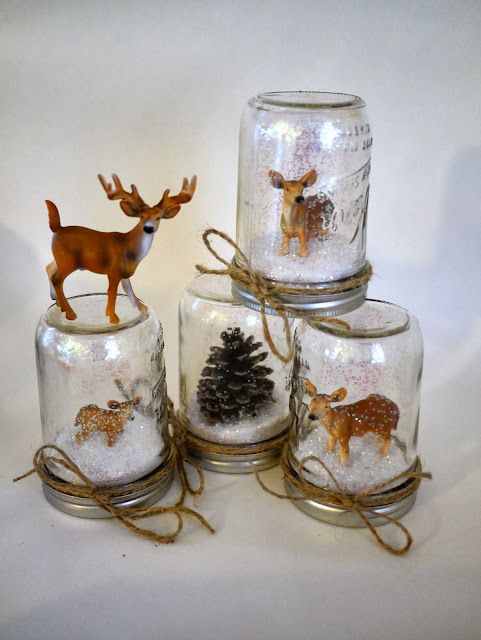
Crafting Magic: “DIY Snow Globes And Their Delightful Uses”
Winter brings with it a sense of enchantment, and there’s no better way to capture that magic than by creating your very own DIY snow globes. These delightful creations not only serve as charming home decor but also provide a sense of wonder and nostalgia. In this blog, we will guide you through the steps of crafting your own snow globes, transforming ordinary glass jars into miniature winter wonderlands.
Materials Needed : Before we dive into the step-by-step process, let’s gather the materials you’ll need:
- Glass jars with tight-fitting lids
- Distilled water
- Glycerin (optional)
- Waterproof super glue
- Figurines or ornaments
- Glitter or fake snow
- Craft foam or small plastic pieces (for elevating figurines)
- Decorative ribbon or twine
- Labels and markers (optional)
Step 1: Select Your Figurines : The first step in creating your snow globe masterpiece is to choose the figurines or ornaments that will adorn your winter wonderland. You can opt for traditional holiday-themed characters like snowmen, Santa Claus, or reindeer, or get creative with your choices. Ensure they fit comfortably inside your chosen glass jar.
Step 2: Prepare Your Base : To give your figurines a stable platform, cut a piece of craft foam or use small plastic pieces to create a base. Glue the figurines onto this base and let them dry completely. You can also paint the base to match the theme of your snow globe.
Step 3: Assemble Your Globe : Fill your glass jar with distilled water, leaving a small gap at the top. Add a few drops of glycerin (if desired) to help the snow or glitter fall slowly. Carefully place your figurines and base into the jar, making sure they don’t touch the sides. Secure the lid tightly.
Step 4: Add the Snow : Sprinkle glitter or fake snow into the water, adjusting the amount to achieve your desired snowfall effect. Remember, less is often more in this case, as too much glitter can make it difficult to see the figurines.
Step 5: Seal and Decorate : Apply a bead of waterproof super glue around the rim of the jar’s lid before screwing it on tightly. Allow it to dry completely. Once sealed, you can decorate the outside of the jar with festive ribbon or twine. Add labels or personalized touches to make it truly your own.
Conclusion : Creating DIY snow globes is a delightful way to usher in the winter season and infuse your home with a touch of magic. These miniature winter wonderlands are not only fun to make but also make fantastic gifts for loved ones. So, gather your materials, let your creativity flow, and craft your own enchanting snow globes. Whether they grace your holiday decor or become cherished keepsakes, these DIY snow globes will certainly bring joy and wonder to your winter days. Enjoy the craft and the enchantment it brings!
FREQUENTLY ASKED QUESTIONS
Can I use any type of jar for making a DIY snow globe?
While glass jars with tight-fitting lids are the most commonly used containers, you can get creative with your choices. You can use plastic containers, provided they are clear and watertight. Just ensure that the lid seals tightly to prevent leaks.
Is glycerin necessary for making snow globes, and what does it do?
Glycerin is optional but recommended. It thickens the water, allowing the snow or glitter to fall more slowly, creating a more visually appealing snowfall effect. Without glycerin, the particles may settle too quickly.
Can I use tap water instead of distilled water?
It’s best to use distilled water because it’s free of impurities and minerals that could cloud the water over time. If you use tap water, consider boiling and cooling it before filling your snow globe to reduce the risk of clouding.

